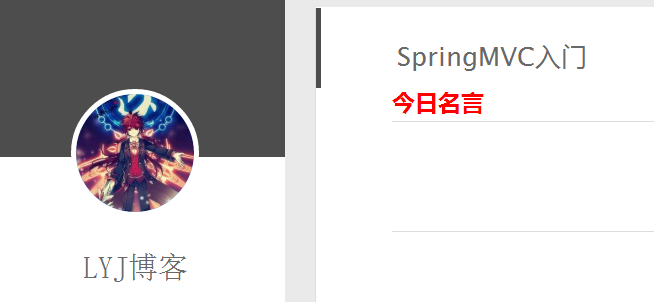
好久没有来写这个博客了,最近忙于自己的博客项目和csdn项目所有这个博客可能暂时不玩了。
安装Hexo
安装node.js
node.js官方下载地址
从上面的链接下载node.js,并安装。
注意:官方链接可能需要翻墙
注意:我的操作系统是Windows 7 (64bit)
设置npm淘宝镜像站
npm默认的源的下载速度可能很慢,建议使用淘宝镜像替换。
执行下面的命令,将npm的源设置成淘宝镜像站。
npm config set registry “https://registry.npm.taobao.org“
申请Github账号
Github注册页面
输入用户名,Email,密码,注册账号。比如我的用户名是:xuezhisd
创建博客仓库
注意,仓库名应该为:用户名.github.io。比如,我的仓库名是:xuezhisd.github.io。
安装git
git下载地址
下载git安装文件,双击执行安装。
配置ssh
打开git bash终端。
设置user.name和user.email。
git config –global user.name “你的GitHub用户名”
git config –global user.email “你的GitHub注册邮箱”
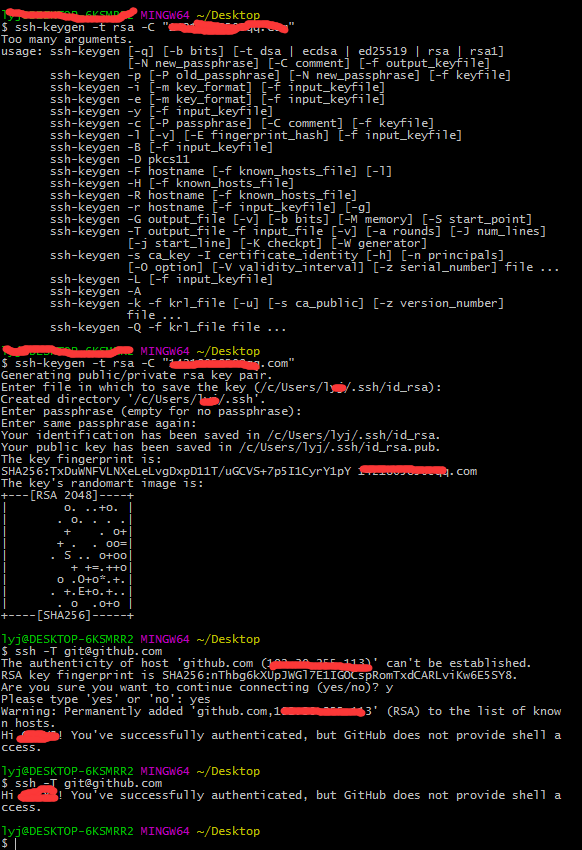
生成ssh密匙
ssh-keygen -t rsa -C “你的GitHub注册邮箱”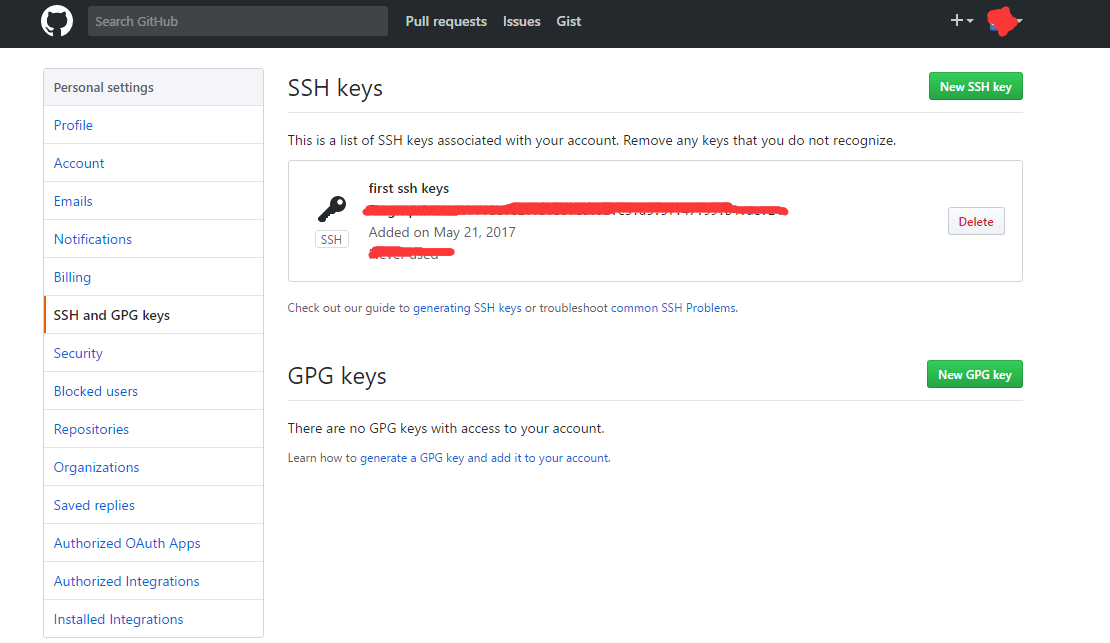
此时,在用户文件夹下就会有一个新的文件夹.ssh,里面有刚刚创建的ssh密钥文件id_rsa和id_rsa.pub。
将公匙添加到github上
上图是已经添加好了的。你只要New SSH Key 然后把之前复制的,添加进去就好了。
测试
ssh -T git@github.com
输入上面命令 ,判断是否绑定成功。
返会 successfully 则成功了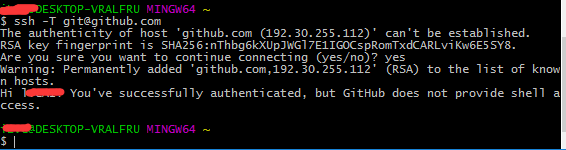
用户头像→Settings→SSH and GPG keys→New SSH key→将id_rsa.pub中的内容复制到Key文本框中,然后点击Add SSH key(添加SSH)按钮。
安装hexo
执行以下命令安装hexo。
安装hexo
npm install hexo-cli g
初始化博客文件夹
hexo init blog
切换到该路径
cd blog
安装hexo的扩展插件
npm install
安装其它插件
npm install hexo-server –save
npm install hexo-admin –save
npm install hexo-generator-archive –save
npm install hexo-generator-feed –save
npm install hexo-generator-search –save
npm install hexo-generator-tag –save
npm install hexo-deployer-git –save
npm install hexo-generator-sitemap –save
初探hexo
第一次使用hexo,在本地创建服务器使用。
生成静态页面
hexo generate
开启本地服务器
hexo s
打开浏览器,地址栏中输入:http://localhost:4000/,应该可以看见刚刚创建的博客了。
问题:为什么访问http://localhost:4000/,无反应?
解决方法:可能是由于端口问题引起的。使用Ctrl+C中断本地服务,使用命令hexo s -p 5000重新开启本地服务,访问http://localhost:5000/可以看到博客页面了。
将hexo博客部署到github上
修改配置文件blog/_config.yml,修改deploy项的内容,如下所示:
Deployment 注释
Docs: https://hexo.io/docs/deployment.html
deploy:
- 类型
type: git - 仓库
repo: git@github.com:xuezhisd/xuezhisd.github.io.git - 分支
branch: master
注意:type: git中的冒号后面由空格。
注意:将git@github.com:xuezhisd/xuezhisd.github.io.git中的用户名换成自己的用户名git@github.com:github_username/github_username.github.io.git。
部署hexo
输入下面的命令将hexo博客部署到github中:
- 清空静态页面
hexo clean - 生成静态页面
hexo generate - 部署
hexo deploy
打开网页,输入http://github_username.github.io,打开github上托管的博客。如我的博客地址是:http://xuezhisd.github.io。
hexo命令缩写
hexo支持命令缩写,如下所示。hexo g等价于hexo generate
hexo g:hexo generate
hexo c:hexo clean
hexo s:hexo server
hexo d:hexo deploy
hexo组合命令
- 清除、生成、启动
hexo clean && hexo g -s
- 清除、生成、部署
hexo clean && hexo g -d
常见问题
hexo deploy没有反应?
修改配置文件:_config.yml时,冒号后面没加空格。
hexo s 网站打不开?
端口占用,换个端口就好了。执行命令hexo s -p 5000,并在浏览器地址栏输入http://localhost:5000,回车访问。
如何换主题?
将主题下载后,放到themes文件夹中即可。例如,下面命令安装next主题:git clone https://github.com/iissnan/hexo-theme-next themes/next。
下载安装yilia主题(我的主题):$ git clone https://github.com/litten/hexo-theme-yilia.git themes/yilia
参考博客:
hexo官方文档
NexT主题官方文档
hexo 下的分类和表签无法显示,怎么解决?
手把手教从零开始在GitHub上使用Hexo搭建博客教程(一)
Github上搭建Hexo如何跨电脑写作部署方便?
Continuous Integration Your Hexo Blog With Travis CI
【Hexo+Github】域名和github绑定的问题
万网域名+GitHub平台搭建的博客